Saturday, March 17, 2012

[MF]Usefull Offline Standalone Installer l Update 3/17/12 More Added + Request!

Standalone Installer

Ok na Ok lalo na sa mga bagong Reprogram/Reformat na PC or Laptop's

All Latest Version as of March 14 2012


Skype 5.8 Latest Version


Download Link: http://www.mediafire.com/?da30l6oplp3sjzi

Yahoo Messenger 11.5.0.192

[IMG][/IMG]

Download Link: http://www.mediafire.com/?adzp0382926p68v

Latest Google Chrome 19 version 2012


Download Link: http://www.mediafire.com/?3av839p826lj85j

Safari 5.1.4 2012


Download Link: http://www.mediafire.com/?ec2evz3gi43beal

Mozilla Firefox 11.0 2012


Download Link: http://www.mediafire.com/?feqnli3m4xu0k92

RocketDock V1.3.5 Desktop Shortcut Bar

This image has been resized. Click this bar to view the full image. The original image is sized 806x607.


Download Link: http://filehippo.com/download_rocket...9935357e0f8f5/

Facebook Messenger 2.0
This is great if you hate the new FB chat . . . Working on VPN's
With Facebook Messenger you can chat with your friends from Facebook without using a browser.
You can see and respond to chats right from your desktop. Whether you're browsing other websites or using another app, you don't have to click away to stay connected.

Thanks to a notifier you will find out about new comments, photo tags and more as soon as they happen.


Download Link: http://www.mediafire.com/?8gmwoee156nncin

VLC Media Player 2.0.0


My favorite Video Player that Can play all kinds of Video Codec . . .

Donload Link: http://www.mediafire.com/?39zvkxcpq160ocp

Adobe Reader 10.1.2


Donwload Link: http://www.filehippo.com/download_ad...f072966f834e3/

By Request: Your Uninstaller! Pro v7.4.2012.01 + Serials


Download Link:http://zbigz.com/file/f79ebdf7436936...e50237071d4/-1

Driver Genius Professional 11 0 0 1112 Final (Update 04 03 2012) + Crack + Key


Download Link: http://zbigz.com/file/cd173fb643d1b7...33fb88ff771/-1

Microsoft Office 2010 Professional [CRACKED]


Click here to Download


Instructions:


1) Install Microsoft® Office Professional 2010 as a trial using one of the given keys, and do not run.

Trial Keys =
YCDJ6-QCY43-CP4JF-7V3GJ-67PRR
368D8-3XC4F-4VB4Q-96CRD-PBYFW


2) Unzip the EZ-Activator "OTK2010V201.zip" to a directory, say "OTK2010V201".

3) Run the file "Office 2010 Toolkit.exe" to get what looks like this image

4) Now, click on EZ-Activator, and wait a while until it finishes the process of activation.

5) Enjoy!


By Request: Direct X 9.29.1974 Offline Installer for 32 & 64 bit . . .


Click here to Download

By Request: Adobe Photoshop CS3 Portable 50mb


Click here to Download

Portable Adobe Photoshop CS5 Extended v12.0.1With Plugins [470mb]


Click here to Download

Adobe Photoshop CS6 v13.0 Pre-release Portable


This is a portable application
no need to crack or serial
just run the setup file for use.

Enjoy.


Click here to Download

By Request: ADOBE Flash Player 11.2.202.221 RC [LATEST]


Click here to Download

7-Zip 9.22 Beta (32-bit)


Click here to Download

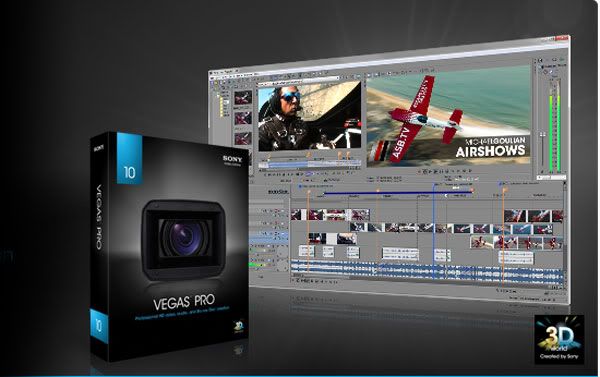
By Request: Sony Vegas PRO 10.0c+Keygen(x86x64)(Registered)

[IMG][/IMG]

Instruction Inside Easy to Install

Click here to Download


CREDITS TO:
Expert OF SYMBIANIZE

Friday, March 16, 2012

DriverPack Solution 12.3 - a full version of the most powerful manager for automated driver installation. Scans your computer hardware and offer to install/update the driver for all devices in Offline mode. Quickly, efficiently and completely FREE!


"Starting Windows"Hang solution!

Kayo po ba ay nahihirapan magformat ng pc dahil kadalasan naka-hang or stuck mo sya sa

"starting windows"

bago po tayo magconclude na hardware ang may problema, try this solution many times ko na po kasi itong tested...


solution:

boot your windows xp into dvd drive

when you enter windows setup press "f6" immediately


antayin nyo lang po mag-appear ang message na ito


then press enter

until you reach starting windows then it should not freeze or stuck again!

the reason why it freeze in starting windows its all because of some drivers in your pc that not installed correctly or not proper installation of device in your pc...

hope it helps!
 
credits to: IKAPO

Thursday, March 15, 2012

Computer POST and beep codes

POST ABCs
The computer power-on self-test (POST) tests the computer to make sure it meets the necessary system requirements and that all hardware is working properly before starting the remainder of the boot process. If the computer passes the POST the computer will have a single beep (with some computer BIOS manufacturers it may beep twice) as the computer starts and the computer will continue to start normally. However, if the computer fails the POST, the computer will either not beep at all or will generate a beep code, which tells the user the source of the problem.
If you're receiving an irregular POST or a beep code not mentioned below follow the POST troubleshooting steps to determine the failing hardware component.
AMI BIOS beep codes
Below are the AMI BIOS Beep codes that can occur. However, because of the wide variety of different computer manufacturers with this BIOS, the beep codes may vary.
Beep CodeDescriptions
1 shortDRAM refresh failure
2 shortParity circuit failure
3 shortBase 64K RAM failure
4 shortSystem timer failure
5 shortProcess failure
6 shortKeyboard controller Gate A20 error
7 shortVirtual mode exception error
8 shortDisplay memory Read/Write test failure
9 shortROM BIOS checksum failure
10 shortCMOS shutdown Read/Write error
11 shortCache Memory error
1 long, 3 shortConventional/Extended memory failure
1 long, 8 shortDisplay/Retrace test failed
AWARD BIOS beep codes
Below are Award BIOS Beep codes that can occur. However, because of the wide variety of different computer manufacturers with this BIOS, the beep codes may vary.
Beep CodeDescription
1 long, 2 shortIndicates a video error has occurred and the BIOS cannot initialize the video screen to display any additional information
Any other beep(s)RAM problem.
If any other correctable hardware issues, the BIOS will display a message.
IBM BIOS beep codes
Below are general IBM BIOS Beep codes that can occur. However, because of the wide variety of models shipping with this BIOS, the beep codes may vary.
Beep CodeDescription
No BeepsNo Power, Loose Card, or Short.
1 Short BeepNormal POST, computer is ok.
2 Short BeepPOST error, review screen for error code.
Continuous BeepNo Power, Loose Card, or Short.
Repeating Short BeepNo Power, Loose Card, or Short.
One Long and one Short BeepMotherboard issue.
One Long and Two Short BeepsVideo (Mono/CGA Display Circuitry) issue.
One Long and Three Short Beeps.Video (EGA) Display Circuitry.
Three Long BeepsKeyboard / Keyboard card error.
One Beep, Blank or Incorrect DisplayVideo Display Circuitry.
Macintosh startup tones
TonesError
Error Tone. (two sets of different tones)Problem with logic board or SCSI bus.
Startup tone, drive spins, no videoProblem with video controller.
Powers on, no tone.Logic board problem.
High Tone, four higher tones.Problem with SIMM.
Phoenix BIOS beep codes
Below are the beep codes for Phoenix BIOS Q3.07 OR 4.X
Beep CodeDescription / What to Check
1-1-1-3Verify Real Mode.
1-1-2-1Get CPU type.
1-1-2-3Initialize system hardware.
1-1-3-1 Initialize chipset registers with initial POST values.
1-1-3-2Set in POST flag.
1-1-3-3Initialize CPU registers.
1-1-4-1Initialize cache to initial POST values.
1-1-4-3 Initialize I/O.
1-2-1-1Initialize Power Management.
1-2-1-2Load alternate registers with initial POST values.
1-2-1-3Jump to UserPatch0.
1-2-2-1 Initialize keyboard controller.
1-2-2-3BIOS ROM checksum.
1-2-3-18254 timer initialization.
1-2-3-3 8237 DMA controller initialization.
1-2-4-1Reset Programmable Interrupt Controller.
1-3-1-1 Test DRAM refresh.
1-3-1-3Test 8742 Keyboard Controller.
1-3-2-1 Set ES segment to register to 4 GB.
1-3-3-1 28 Autosize DRAM.
1-3-3-3 Clear 512K base RAM.
1-3-4-1 Test 512 base address lines.
1-3-4-3 Test 512K base memory.
1-4-1-3Test CPU bus-clock frequency.
1-4-2-4Reinitialize the chipset.
1-4-3-1 Shadow system BIOS ROM.
1-4-3-2Reinitialize the cache.
1-4-3-3Autosize cache.
1-4-4-1Configure advanced chipset registers.
1-4-4-2 Load alternate registers with CMOS values.
2-1-1-1 Set Initial CPU speed.
2-1-1-3 Initialize interrupt vectors.
2-1-2-1 Initialize BIOS interrupts.
2-1-2-3Check ROM copyright notice.
2-1-2-4 Initialize manager for PCI Options ROMs.
2-1-3-1 Check video configuration against CMOS.
2-1-3-2 Initialize PCI bus and devices.
2-1-3-3 Initialize all video adapters in system.
2-1-4-1 Shadow video BIOS ROM.
2-1-4-3 Display copyright notice.
2-2-1-1Display CPU type and speed.
2-2-1-3Test keyboard.
2-2-2-1 Set key click if enabled.
2-2-2-356 Enable keyboard.
2-2-3-1Test for unexpected interrupts.
2-2-3-3 Display prompt Press F2 to enter SETUP.
2-2-4-1 Test RAM between 512 and 640k.
2-3-1-1Test expanded memory.
2-3-1-3Test extended memory address lines.
2-3-2-1 Jump to UserPatch1.
2-3-2-3Configure advanced cache registers.
2-3-3-1 Enable external and CPU caches.
2-3-3-3 Display external cache size.
2-3-4-1Display shadow message.
2-3-4-3 Display non-disposable segments.
2-4-1-1Display error messages.
2-4-1-3 Check for configuration errors.
2-4-2-1Test real-time clock.
2-4-2-3 Check for keyboard errors
2-4-4-1 Set up hardware interrupts vectors.
2-4-4-3Test coprocessor if present.
3-1-1-1Disable onboard I/O ports.
3-1-1-3 Detect and install external RS232 ports.
3-1-2-1 Detect and install external parallel ports.
3-1-2-3 Re-initialize onboard I/O ports.
3-1-3-1 Initialize BIOS Data Area.
3-1-3-3 Initialize Extended BIOS Data Area.
3-1-4-1 Initialize floppy controller.
3-2-1-1Initialize hard-disk controller.
3-2-1-2Initialize local-bus hard-disk controller.
3-2-1-3 Jump to UserPatch2.
3-2-2-1 Disable A20 address line.
3-2-2-3 Clear huge ES segment register.
3-2-3-1 Search for option ROMs.
3-2-3-3 Shadow option ROMs.
3-2-4-1 Set up Power Management.
3-2-4-3 Enable hardware interrupts.
3-3-1-1Set time of day.
3-3-1-3 Check key lock.
3-3-3-1 Erase F2 prompt.
3-3-3-3 Scan for F2 key stroke.
3-3-4-1 Enter SETUP.
3-3-4-3 Clear in-POST flag.
3-4-1-1Check for errors
3-4-1-3POST done--prepare to boot operating system.
3-4-2-1 One beep.
3-4-2-3 Check password (optional).
3-4-3-1 Clear global descriptor table.
3-4-4-1 Clear parity checkers.
3-4-4-3 Clear screen (optional).
3-4-4-4 Check virus and backup reminders.
4-1-1-1 Try to boot with INT 19.
4-2-1-1 Interrupt handler error.
4-2-1-3 Unknown interrupt error.
4-2-2-1 Pending interrupt error.
4-2-2-3 Initialize option ROM error.
4-2-3-1 Shutdown error.
4-2-3-3 Extended Block Move.
4-2-4-1 Shutdown 10 error.
4-3-1-3 Initialize the chipset.
4-3-1-4 Initialize refresh counter.
4-3-2-1 Check for Forced Flash.
4-3-2-2 Check HW status of ROM.
4-3-2-3 BIOS ROM is OK.
4-3-2-4 Do a complete RAM test.
4-3-3-1 Do OEM initialization.
4-3-3-2 Initialize interrupt controller.
4-3-3-3 Read in bootstrap code.
4-3-3-4 Initialize all vectors.
4-3-4-1 Boot the Flash program.
4-3-4-2 Initialize the boot device.
4-3-4-3 Boot code was read OK.
Basic networking 

TOOLS IN NETWORKING

1. UTP CABLE


2. RJ-45


3. CRIMPING TOOL


4. LAN TESTER


5. LAN CARD


6. HUB, SWITCH HUB


7. ROUTER


TYPES OF UTP CABLE PINOUT AND COLOR CODING

Straight Cable

You usually use straight cable to connect different type of devices. This type of cable will be used most of the time and can be used to:

1) Connect a computer to a switch/hub's normal port.
2) Connect a computer to a cable/DSL modem's LAN port.
3) Connect a router's WAN port to a cable/DSL modem's LAN port.
4) Connect a router's LAN port to a switch/hub's uplink port. (normally used for expanding network)
5) Connect 2 switches/hubs with one of the switch/hub using an uplink port and the other one using normal port.


Crossover Cable

Sometimes you will use crossover cable, it's usually used to connect same type of devices. A crossover cable can be used to:

1) Connect 2 computers directly.
2) Connect a router's LAN port to a switch/hub's normal port. (normally used for expanding network)
3) Connect 2 switches/hubs by using normal port in both switches/hubs.


HOW TO CREATE ETHERNET CABLE

WATCH THIS:
http://www.youtube.com/watch?v=QWGwaXMUEKs

THE DIFFERENCE BETWEEN HUBS, SWITCHES AND ROUTERS

HUB

In a hub, a frame is passed along or "broadcast" to every one of its ports. It doesn't matter that the frame is only destined for one port. The hub has no way of distinguishing which port a frame should be sent to. Passing it along to every port ensures that it will reach its intended destination. This places a lot of traffic on the network and can lead to poor network response times.
Additionally, a 10/100Mbps hub must share its bandwidth with each and every one of its ports. So when only one PC is broadcasting, it will have access to the maximum available bandwidth. If, however, multiple PCs are broadcasting, then that bandwidth will need to be divided among all of those systems, which will degrade performance.

SWITCH HUB

A switch, however, keeps a record of the MAC addresses of all the devices connected to it. With this information, a switch can identify which system is sitting on which port. So when a frame is received, it knows exactly which port to send it to, without significantly increasing network response times. And, unlike a hub, a 10/100Mbps switch will allocate a full 10/100Mbps to each of its ports. So regardless of the number of PCs transmitting, users will always have access to the maximum amount of bandwidth. It's for these reasons why a switch is considered to be a much better choice then a hub.

ROUTER

Routers are completely different devices. Where a hub or switch is concerned with transmitting frames, a router's job, as its name implies, is to route packets to other networks until that packet ultimately reaches its destination. One of the key features of a packet is that it not only contains data, but the destination address of where it's going.
A router is typically connected to at least two networks, commonly two Local Area Networks (LANs) or Wide Area Networks (WAN) or a LAN and its ISP's network . for example, your PC or workgroup and EarthLink. Routers are located at gateways, the places where two or more networks connect. Using headers and forwarding tables, routers determine the best path for forwarding the packets. Router use protocols such as ICMP to communicate with each other and configure the best route between any two hosts.

Routers are also the only one of these devices that will allow you to share a single IP address among multiple network clients.

So, in short, a hub glues together an Ethernet network segment, a switch can connect multiple Ethernet segments more efficiently and a router can do those functions plus route TCP/IP packets between multiple LANs and/or WANs; and much more of course.

SIMPLE DIAGRAM IN NETWORKING WITH INTERNET